For Green Bean Casserole, Just Say NO!
to Canned Green Beans & Mushroom Soup
(Part 2 - The Fresh Mushrooms)

How to make a green bean casserole from scratch with fresh green beans and fresh mushrooms. Below are step-by-step photos showing how to make the fresh green bean casserole recipe so many cooks have made (and loved!) since 2006. It's an adaptation of a Cooks' Illustrated recipe so good I dubbed it the World's Best Green Bean Casserole.
To make the pages load faster, especially for those using their phones and other mobile devices from the kitchen, the recipe tips are in three sections:
HOW-TO PHOTOS & COOKING TIPS for the
WORLD'S BEST GREEN BEAN CASSEROLE
~ Part 1: How to Cook the Green Beans ~
~ Part 2: How to Cook the Mushroom Sauce (you are here) ~
~ Part 3: How to Mix the Topping & Bake the Casserole ~
~ return to recipe for World's Best Green Bean Casserole ~
~ Printer Friendly Recipe ~
WORLD'S BEST GREEN BEAN CASSEROLE
~ Part 1: How to Cook the Green Beans ~
~ Part 2: How to Cook the Mushroom Sauce (you are here) ~
~ Part 3: How to Mix the Topping & Bake the Casserole ~
~ return to recipe for World's Best Green Bean Casserole ~
~ Printer Friendly Recipe ~
 Okay so now it's time to make the homemade mushroom sauce, essentially a thick version of homemade mushroom soup that replaces the cans of mushroom soup in the fresh green bean casserole. Okay so now it's time to make the homemade mushroom sauce, essentially a thick version of homemade mushroom soup that replaces the cans of mushroom soup in the fresh green bean casserole. I like the color of portobello mushrooms, those are the ones with the woodsy-brown color, but white button mushrooms are just fine. If you can, opt for smaller mushrooms rather than bigger ones. |
 Don't just 'clean' the mushrooms, wash 'em! Yes, I know, it's heresy, so many recipes say 'don't wash the mushrooms, they'll get soggy'. Well, yes, if the mushrooms are going to be eaten raw. But these mushrooms are going to be cooked, so go ahead and give them a good rinse. Don't just 'clean' the mushrooms, wash 'em! Yes, I know, it's heresy, so many recipes say 'don't wash the mushrooms, they'll get soggy'. Well, yes, if the mushrooms are going to be eaten raw. But these mushrooms are going to be cooked, so go ahead and give them a good rinse. |
 Break off the mushroom stems, it just takes a quick snap and off they come. You can put them in your Rachael Ray bucket, or, better yet, chop them up to add to a batch of Homemade Mushroom Soup. It's a perfect night-before-Thanksgiving-supper, to my taste anyway and maybe to yours! Break off the mushroom stems, it just takes a quick snap and off they come. You can put them in your Rachael Ray bucket, or, better yet, chop them up to add to a batch of Homemade Mushroom Soup. It's a perfect night-before-Thanksgiving-supper, to my taste anyway and maybe to yours! |
 TIP #7 - DON'T CUT THE MUSHROOM CAPS, BREAK THEM INTO PIECES So yeah, put that knife down! You could chop the mushroom caps, whackety whack, done. But it turns out, breaking the mushroom caps into pieces is really important to the texture of the green bean casserole. You know how cans of mushroom soup have all those bits of sliced mushrooms? It's a dead give-away. Instead, breaking the mushrooms makes for uneven, rough surfaces, it's the sign that the mushroom soup doesn't come from a can! TIP #7 - DON'T CUT THE MUSHROOM CAPS, BREAK THEM INTO PIECES So yeah, put that knife down! You could chop the mushroom caps, whackety whack, done. But it turns out, breaking the mushroom caps into pieces is really important to the texture of the green bean casserole. You know how cans of mushroom soup have all those bits of sliced mushrooms? It's a dead give-away. Instead, breaking the mushrooms makes for uneven, rough surfaces, it's the sign that the mushroom soup doesn't come from a can! |
 So you'll end up with a big pile of mushroom pieces. This is a good thing - they'll cook down, plus, don't worry if the pieces are a little big, there will be other chances to break them into smaller pieces. No knives! So you'll end up with a big pile of mushroom pieces. This is a good thing - they'll cook down, plus, don't worry if the pieces are a little big, there will be other chances to break them into smaller pieces. No knives! |
 First we'll cook the mushrooms. Let the butter melt, then stir in the mushrooms and garlic, stirring thoroughly to coat the mushrooms with the butter, this helps them cook evenly. First we'll cook the mushrooms. Let the butter melt, then stir in the mushrooms and garlic, stirring thoroughly to coat the mushrooms with the butter, this helps them cook evenly. |
 As they begin to cook, the mushrooms will exude liquid. Don't worry, this is natural, the loss of liquid is why they 'shrink' during cooking. Keep stirring the mushrooms, letting the liquid get soaked back up by the mushroom pieces. As they begin to cook, the mushrooms will exude liquid. Don't worry, this is natural, the loss of liquid is why they 'shrink' during cooking. Keep stirring the mushrooms, letting the liquid get soaked back up by the mushroom pieces. |
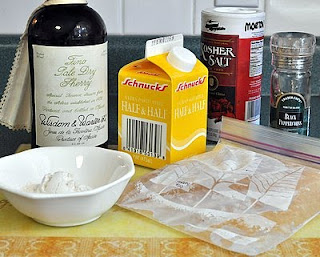 We're going to move along quite quickly now, so gather the ingredients needed to finish the sauce. There aren't many, just flour, sherry, half & half and salt and pepper. We're going to move along quite quickly now, so gather the ingredients needed to finish the sauce. There aren't many, just flour, sherry, half & half and salt and pepper. See that bottle of sherry? It's worth investing $8-10 in at the liquor store, it is 1000 times better than the "cooking sherry" that grocery stores sell in the baking aisle. It keeps forever and it makes ALL the difference in stews, custards and so many more dishes. And it MAKES the green bean casserole, I promise. Don't believe me? Okay, no problem, we'll do a taste test in a minute. |
 Sprinkle the flour over the hot mushrooms. The flour acts as a thickener and it's going to get lumpy, fast, so that's why you spread it as much across the mushrooms as possible, rather than one big pile in the center, say. Sprinkle the flour over the hot mushrooms. The flour acts as a thickener and it's going to get lumpy, fast, so that's why you spread it as much across the mushrooms as possible, rather than one big pile in the center, say. |
 TIP #8 - LET THE FLOUR COOK The flour and mushrooms will seize up into something dry and thick in appearance. But keep stirring, for at least a minute or two, because this lets the flour cook, which removes the floury taste from the end product. TIP #8 - LET THE FLOUR COOK The flour and mushrooms will seize up into something dry and thick in appearance. But keep stirring, for at least a minute or two, because this lets the flour cook, which removes the floury taste from the end product. |
 TIP #9 - AT FIRST, ADD THE STOCK JUST A TABLESPOON AT A TIME This is such an important technique, one that's used in all kinds of sauces, stews, etc, whenever a starch like flour is being used to thicken something that's liquid. TIP #9 - AT FIRST, ADD THE STOCK JUST A TABLESPOON AT A TIME This is such an important technique, one that's used in all kinds of sauces, stews, etc, whenever a starch like flour is being used to thicken something that's liquid. If you add the liquid all at once, it's impossible for the flour to absorb all that liquid, all at once. So the mixture turns out lumpy. If you add the liquid all at once, you'll get lumpy gravy, lumpy soup, lumpy messes one and all. Not good! Instead, add the liquid (in this case, chicken broth or chicken stock) a tablespoon at a time at first. (There's no real need to measure, just add a small splash at a time.) Stir in that tablespoon of liquid until the flour absorbs it all, then add another, stir until it's absorbed, and so on and so on. As the mixture becomes looser and looser, each addition may be increasingly larger. |
 Once the mushroom mixture is all loose and liquidy, go ahead and add the half & half. Once the mushroom mixture is all loose and liquidy, go ahead and add the half & half. Funny story, in the "duh" category. Not all that long ago, on Twitter, I asked how much cream was in half & half. Some gentle soul, I think it might have been Lisa Fain from Homesick Texan asked politely, "Isn't half & half made from, you know, half cream and half milk?" DUH. |
 Let the mixture cook down and thicken, every so often it will come to a boil and especially then, give the entire mixture a good stir, scraping the bottom so that it doesn't burn. It doesn't need to be stirred continuously -- that means without interruption -- but it does need to be stirred continually -- that means again and again. Don't walk away, stay nearby and pay attention. Let the mixture cook down and thicken, every so often it will come to a boil and especially then, give the entire mixture a good stir, scraping the bottom so that it doesn't burn. It doesn't need to be stirred continuously -- that means without interruption -- but it does need to be stirred continually -- that means again and again. Don't walk away, stay nearby and pay attention. |
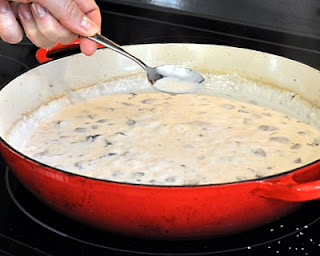 See how it's all nice and thick, like mushroom soup? See how it's all nice and thick, like mushroom soup? Now, let's do a taste test. Grab a spoon. Take the "before" taste. |
 TIP #10 - ADD THE SECRET INGREDIENT, DRY SHERRY Just one tablespoon, a single tablespoon, of sherry makes such a difference. TIP #10 - ADD THE SECRET INGREDIENT, DRY SHERRY Just one tablespoon, a single tablespoon, of sherry makes such a difference. Now do the "after" taste. See what I mean? This is NOT your mama's green bean casserole! |
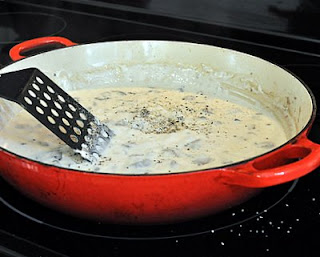 TIP #11 - BE EXTRA GENEROUS WITH THE PEPPER, TOO. TIP #11 - BE EXTRA GENEROUS WITH THE PEPPER, TOO. |
 Whew! Almost done! Stir the beans into the mushroom sauce, don't think look just gorgeous? Whew! Almost done! Stir the beans into the mushroom sauce, don't think look just gorgeous? |
 Spray your favorite oven-safe baking dish. Spray your favorite oven-safe baking dish. Consider the 'depth' of the dish. I use a quiche dish that's quite shallow -- which, by the way, is perfect for a double batch. For the times I've made a triple or even quadruple batch, I've used a larger and deeper baking dish. It works beautifully but especially if you're making the casserole ahead of time for serving later, it takes a long time to let the casserole come back to room temperature and longer to heat it up until all hot and bubbly. |
 Transfer the beans to the baking dish. Be sure to gather up all of the mushroom sauce, doesn't it look good?!! Transfer the beans to the baking dish. Be sure to gather up all of the mushroom sauce, doesn't it look good?!! |
 Spread that mushroom sauce around so that it can soak into the beans. Are we hungry yet? Yum! Spread that mushroom sauce around so that it can soak into the beans. Are we hungry yet? Yum! Are you baking the casserole right away? If so, you'll need that onion topping. ~ Part 3: How to Mix the Topping & Bake the Casserole ~ |
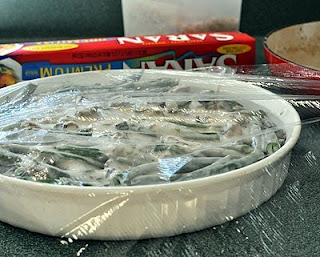 Otherwise, cover the beans with plastic wrap. You'll still need the onion topping, but keep it separate. Otherwise, cover the beans with plastic wrap. You'll still need the onion topping, but keep it separate. |
DO YOU LIKE THIS RECIPE? SIGN UP FOR A FREE E-MAIL SUBSCRIPTION AND YOU'LL NEVER MISS A NEW RECIPE. A Veggie Venture is the food blog about vegetables, home to the famous A-Z of Vegetables and second-generation food writer and 'veggie evangelist' Alanna Kellogg. For 'home delivery' of new vegetable recipes from A Veggie Venture, sign up here. Once you do, new recipes will be delivered, automatically, straight to your e-mail In Box. Subscriptions are free and every recipe includes nutrition information, Weight Watchers points and Alanna's tips and tricks, useful ideas for new and experienced cooks alike.
© Copyright Kitchen Parade 2010




I am so excited about this! My husband's family loves that canned green bean casserole at Thanksgiving and I hate it...he misses it, so this is a welcome surprise. Can't wait to make it!
ReplyDeleteAll I can say is wow! I hate anything canned so I decided to try and look for a fresh green bean casserole recipe and this one came up. I was so delicious and was a huge hit on Thanksgiving. I am definitely saving this one!
ReplyDelete~Alyssa~
This comment has been removed by a blog administrator.
ReplyDeleteWhat are the dimensions of the quiche pan you use? For a double batch, I'm debating between 2 9" pie glass pans (each holds .75 quarts) or a disposable, aluminum lasagne pan, that's 11.75x9.5x1.5 (possibly 2 of these, depending). Thanks in advance for your (hopefully) quick response. ;) If I don't hear back in time, I'll just wing it (and report back with my findings).
ReplyDeleteAmanda ~ You caught me in a much-needed break after cooking for Thanksgiving since five this morning! Thanks to your query, I have an excuse to linger a little longer in this most comfy chair. Thank you .... zzzzzzzzz
ReplyDeleteOh! You asked a question, right! My quiche pan is 9" and about 1" tall. I'd vote for the heavier quiche pans, not sure about even heating etc with the other - just no experience with them, you may know otherwise. Happy Thanksgiving! I'm off to make a pie crust!