Day 156: Slow-Roasted Tomatoes ♥

How to roast tomatoes, slowly, slowly, slowly. In 2005, I roasted 15 batches of tomatoes, keeping notes as I experimented with oven temperature, time in the oven, how much oil to use, whether fresh or dried herbs worked better.
From mid-September through early October, the house was aromatic with a gentle tomato scent from 15 batches of Slow-Roasted Tomatoes.
Each batch was a little different. I played with oven temperature, oven time, a little oil and a lot of oil, fresh herbs and dried herbs. I even experimented with Fast-Roasted Tomatoes but quickly returned to these.
The inspiration came from StephenCooks, whose site includes the warning, "If you're looking for something quick here, I'm sorry but most of the dishes I cook take far too long to be called quick." His ideas about slow-roasted tomatoes are here.
Slow-Roasted Tomatoes do take awhile from start to finish but hands-on, only about 10 minutes to start, 10 minutes to finish. That fits my definition of quick-n-easy ... when it's worth it, which I find slow-roasted tomatoes to be ... very much worth it. Recipes so far include Tomato Bread Pudding IV, Pasta with Slow-Roasted Tomatoes, Roasted Tomato, Eggplant & Garlic Pizza and Slow-Roasted Tomato Soup. But the freezer is stocked so there will be many more in the winter months to come. (9/06 And so there were ... see all the recipes using slow-roasted tomatoes.)
The great news is that there's hardly any going wrong with slow-roasted tomatoes, all the variations are good. But the "recipe" below, after much trial and error, is the one that'll transform this house into a tomato-roasting factory for years to come.
RECIPE for SLOW-ROASTED TOMATOES
Hands-on time: 10 minutes to start, 10 minutes to finish
Time to table: 8 - 24 hours
Makes about 2 1/2 - 3 cups
Time to table: 8 - 24 hours
Makes about 2 1/2 - 3 cups
- For a photo tutorial, see Slow-Roasted Tomatoes at Kitchen Parade, where I turned my experiments into a column about the joys of roasting tomatoes in late summer.
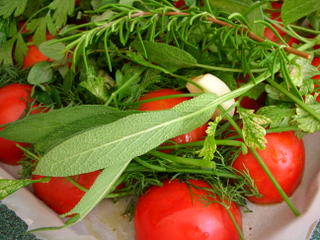
- Choose Roma-type (that is, meaty vs juicy) tomatoes. I use Cascades recommended by the Tomato Man).
- Do double batches to maximize oven time. Each batch consistently used about 20 tomatoes, about 4 pounds purchased for $3.
- Set oven to 200F.
- Spread 1 tablespoon olive oil (which I found plenty but important) directly on baking sheet (no need for parchment).
- Sprinkle with dried herbs (dried turned out more flavorful than fresh) including 1 tablespoon fennel (though 2 tablespoons too much) and after that herbs that seem right, including Italian seasoning, basil, sage, oregano, thyme.
- Sprinkle the oil/herbs with salt and pepper (salt's especially important!).
- Halve the tomatoes (when cutting, leave stem bit on one side vs slicing down its middle, makes it easier to remove skins later; skin blemishes are okay since will come off, anything penetrating into flesh should be removed before roasting).
- Place cut-side down in a single layer on baking sheet, rubbing in oil a little bit when arranging. If you like, tuck in unpeeled garlic cloves.
- Sprinkle again with salt and pepper.
- Roast 10 - 12 hours (9 too few, 13 too many). (9/06) The first time you roast tomatoes, check on them every hour or so. Otherwise you might end up with charred creatures.
- Let cool. (9/06) The tomatoes are slightly easier to peel when still slightly warm.
- Slip tomato skins off, collecting tomato meat and juices. Transfer to freezer bags. Remove the air from the bags and seal. Freeze. (9/06) To thaw, place in a bowl to collect the juices that seep from the bags.
ALANNA's KITCHEN NOTES
NEVER MISS A RECIPE! For 'home delivery' of new recipes from A Veggie Venture, sign up here. Once you do, new recipes will be delivered, automatically, straight to your e-mail In Box.
A Veggie Venture is home of 'veggie evangelist' Alanna Kellogg and the
famous asparagus-to-zucchini Alphabet of Vegetables.
© Copyright Kitchen Parade 2006
famous asparagus-to-zucchini Alphabet of Vegetables.
© Copyright Kitchen Parade 2006


Hi Alanna:
ReplyDeleteIt's Rand, Kalyn's brother. She just sent me to your site (and Stephen cooks) for a little tutorial on "slow roasted tomatoes." Thanks for the very thorough post. I'm off to roast. They just look soooo good.
Thanks again for doing all the research so the rest of us can make these wonderful treats. I'm linking to you in my post today about the tomatoes I made.
ReplyDeleteAlanna, thanks for reminding me to get going on this year's batch of roasted tomatoes. I freeze them and use them all winter to kick up pasta sauces, stews, and sometimes (in the privacy of my own kitchen!), I'll just eat them straight from the container.... I use Roma tomatoes, or whatever bounty I receive from generous friends' gardens. Cut tomatoes in half, place cut side up on a sheet pan. Sprinkle with chopped garlic and thyme from my herb garden. A bit of sea salt and fresh black pepper. A drizzle of really fruity extra-virgin olive oil. All into a 250°F oven for 2-3 hours, until they collapse. Then pack in containers with the oil and juices that have collected on the sheet pan, and freeze. Yum.
ReplyDeleteHi Lydia ... so glad you've joined the slow-roasting club! I really would urge you to try the sloooooooooooow roasting, 11 - 12 hours. It's an amazing difference. So far this year I've been roasting->eating vs roasting->freezing. Must heat up that oven again!
ReplyDeleteHi, I'm new to the whole roasting tomatoes, but they sound so yummy. I can't wait to try them. I didn't grow any romas, so would my bigger tomatoes work? I hope so, I'm looking for something other than canning salsa to use my tomatoes for.
ReplyDeleteHi Amy, They really ARE something special. It's not so much the size that of the tomatoes but the relative proportions of "meat":water. Romas and Cascades are meatier so there's more flesh to stand up to the heat. Tomatoes grown for eating have a high proportion of water and so are likely to disintegrate. ALL THIS SAID: if you've got piles of tomatoes, I'd suggest putting a few in the oven, then checking every half hour to see how they do, what happens. That way you can know if it's worthwhile. Good luck! Let me know how it goes! I'm sure you're not alone.
ReplyDeleteHi Alanna,
ReplyDeleteI have a boat load of cherry tomatoes and I'm trying to figure out how to make them last. Do you think they'd work for roasting? (I'm sure they wouldn't be as good as romas!)Or, do you have any other great ideas to preserve them...we can't eat them fast enough!
Hi Julie ~ Try roasting a tray, to see. But watch the time since the cherries are some smaller and we don't always know how well our ovens are callibrated at low temps.
ReplyDeleteIf you have a big freezer, this techniqueworks great for small tomatoes. My "Tomato Man" says they'll stay great all winter, I've only frozen them for a couple of weeks. That said, they were frozen in a colander and never moved to freezer bags during that time!
You might also check herefor ideas on how to EAT them, now, in quantity. This one didn't make that list somehow but I made it again this week and it's GORGEOUS.
I'd suggest experimenting a bit, then reporting back on what you find.
I've been making these, and they're just wonderful. Unfortunately, space in my freezer is limited. What are your thoughts on preserving them via home canning (the boiling water bath sort) in mason jars? Do they need to be acidified? How much? Will that ruin the taste? Have you tried that at all?
ReplyDeleteIn any case, thank you for the idea. I have been very inspired by their tastiness, and will hopefully get to play more with them and post about what I do with them soon.
Hi Danielle ~ Hmm. I just don't know because while I've canned lots of things, tomatoes aren't on the list. At the moment I can't even think who WOULD know. (Maybe go to Google Blog Search to see who's canned a lot of tomatoes, get their advice. If you find something, be sure to come back to say so others can know too. You can't be alone on the issue of freezer space.) Hmmm. In Brooklyn, I don't suppose there's any changing the freezer space? I mention this because a chest freezer is decently priced, $3-400, maybe even less. We got one for my sister and her family for Christmas one year, I was surprised. You do have to cook a lot though. You know the other way you could think of this is, tomatoes are seasonal, you'll eat and freeze what you can as long as you can, then you'll wait til next year ... and look forward to them even more. Yes? maybe?
ReplyDeleteI just made a batch of these, and I suspect I didn't cook them long enough. The skins looked plenty wrinkly and each tomato was getting a black ring of carmelization around it (after about 9 hours at 250). I tried to peel them after they sat out and cooled (probably too long), but it was making a mess of them, so I just froze them with the skins on. I ate one with skin on and while it wasn't super tender, the skin wasn't too tough either. Is there a reason you recommend peeling them? I threw mine in the freezer for safe keeping (might end up eating them all plain otherwise). Hope they and the skins survive well.
ReplyDeleteHi. Burchco ~ Yes I did a batch for an amazing 19 hrs last month, an accident and 'too done' but a good lesson on how one batch might vary from the next. I take the skins off because I find them tough, not for eating alone but for sauces, soups, etc. I do hope you enjoy these!
ReplyDeleteI love the fact you've written the differences in batches and outcomes. I'm researching elements for a recipe I'm putting together - thank you so much!
ReplyDeleteAlanna,
ReplyDeleteI have a gas range here in the new place. Since I'm new to gas, I'm a bit worried about having the oven on all night long. Is that silly? Or should I slow roast during the day?
Oh Kir, I hope you love the gas! And yes, do your first batch during the day, not because of the gas per se but to watch to see how many hours work for you, in your oven.
ReplyDelete